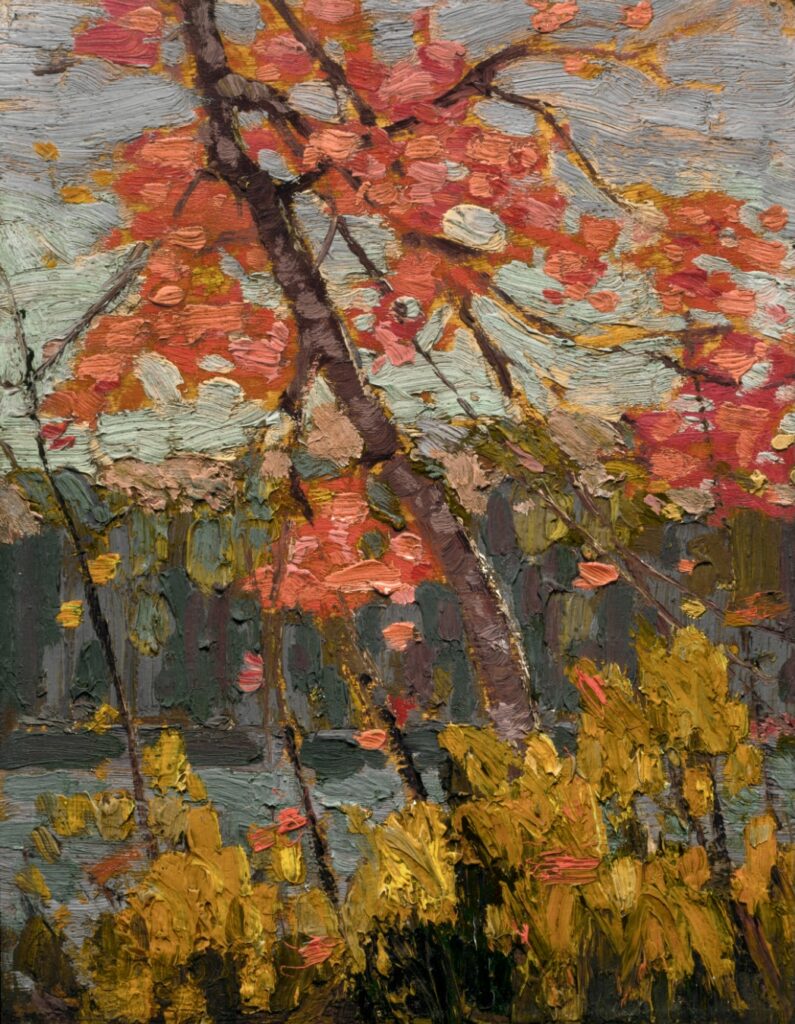
I’ve been spending a lot of time lately admiring the oil sketches of Tom Thomson and the Group of Seven. These were Canadian artists painting en plein air in the early 20th century, and their sketches are spontaneous, vivid, almost vibrating with the beauty of their reflection of the natural environment.
Their finished studio works were also stunning, but seeing something like Thomson’s Twisted Maple is enough to make me reach for my shoes and jacket to go for a hike in the woods.
Inspired by these artists and with the Victoria Day long weekend fast approaching, I had been looking forward to getting outside for some plein air painting.
Only one problem – I did not have a pochade box, and my studio easel is too bulky to carry around with me.
In particular, I was interested in a very small handheld pochade box that I could use for small oil sketches – ideally around 5×7″, but supporting anywhere from 4×6″ to 6×8″ comfortably would be a plus.
Like a good little consumer I spent time digging through different marketplaces and checking out a variety of boxes for this purpose, but I quickly came to realize that even a fairly low-end box that would meet my needs was going to come with a higher price tag than I was willing to pay. After all, a pochade box doesn’t need to do much more than hold the panel I’m painting, some supplies (paints, brushes, towels), and offer some palette space.
Since this would be my first plein air experience I did not want to invest a lot of money in equipment – after all, if I didn’t enjoy painting outdoors there’s a good chance that a very expensive pochade box would become little more than a shelf decoration gathering dust.
Since I wanted to do this on the cheap, I set out to my local dollar store with the goal of building the least expensive pochade box I could make that would meet my needs.
Here is the full list of materials I used – note that the two types of glue were only there because I ran out of superglue halfway through the build – I’d recommend sticking with just the wood glue:
- Wood box
- Wood slats
- Superglue
- Wood glue
- JB Weld SteelStick epoxy
- Dremel (I used a Dremel 4000 with cut-off discs, but any rotary tool with similar discs should work fine)
- Linseed oil & burnt sienna oil paint – for treating the finished box, these are optional.
As you can see, this is not exactly a demanding supply list. Other than the Dremel, the rest of the supplies are inexpensive even if you don’t have them laying around the house. The Dremel can be replaced by any other rotary tool, or any saw that can cut the wood slats and a slot in the box for the palette to attach to.
After poking around the dollar store a little, I found the right box to serve as the core of my new pochade box.
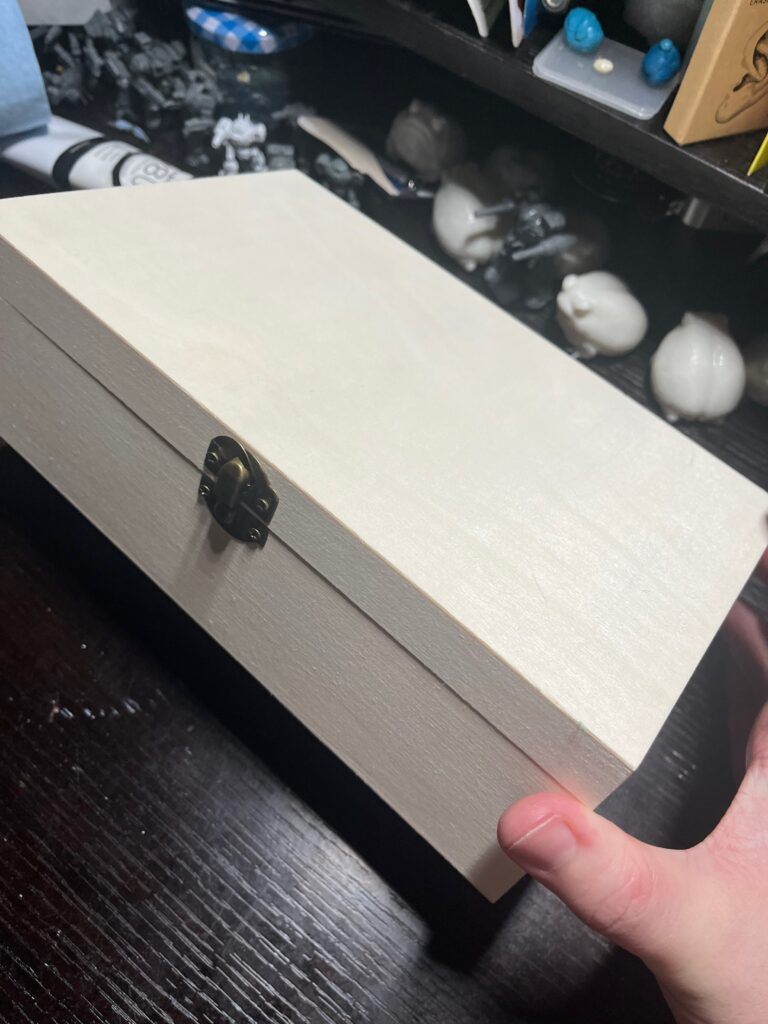
The box is exactly what you’d expect from a wood box from a dollar store – mostly very thin sheets of wood glued together, but it felt strong enough to work for me, and at $4.50 CAD the price was definitely right.
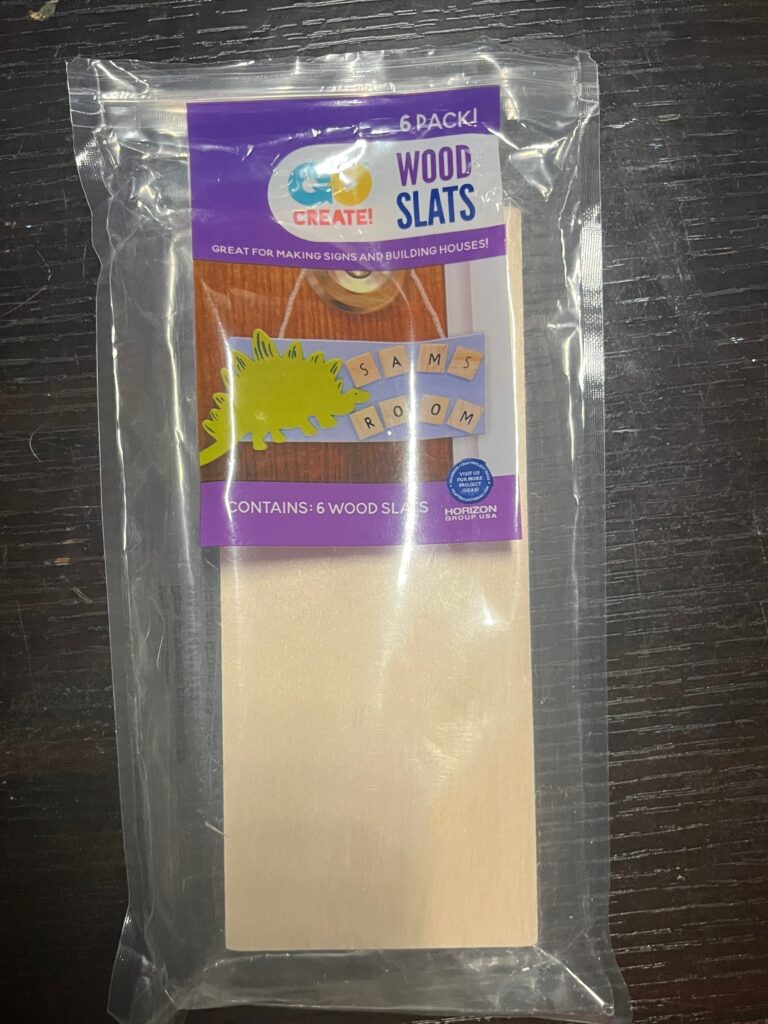
I supplemented the box with a set of wood slats which actually feel significantly nicer than the box itself – and at $1.25 for a pack of 6, I had plenty of material to work with.
The construction process was simple.
Before starting any serious work, I gently sanded the entirely box with a fine-grit sanding block that I use for sanding gesso – I’d rather avoid ending a plein air session with splinters in my fingers!
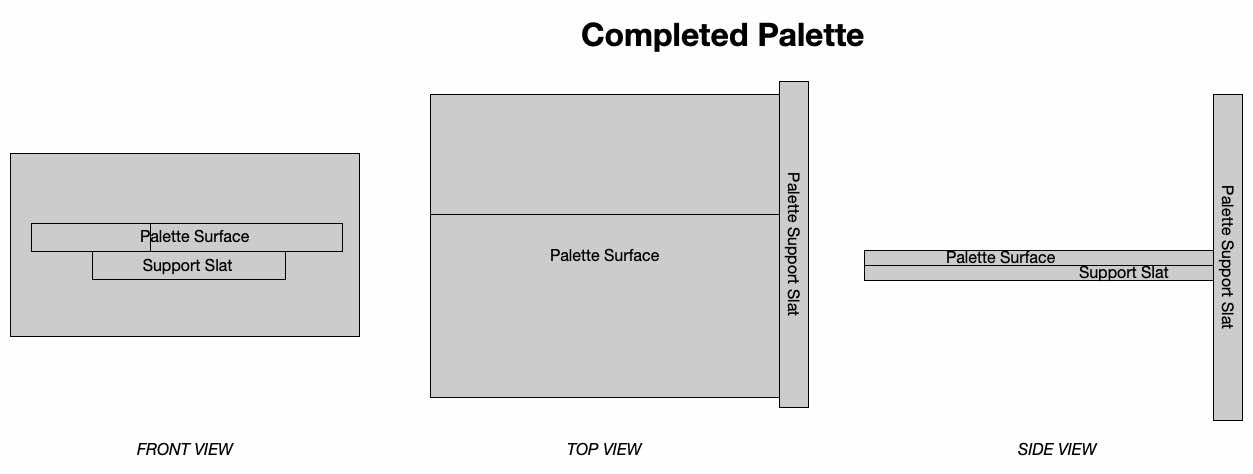
Unfortunately, I did not take pictures during much of the build, so you’ll have to settle for diagrams I put together for the design.
Starting with the palette, I selected four wooden slats to assemble like this:
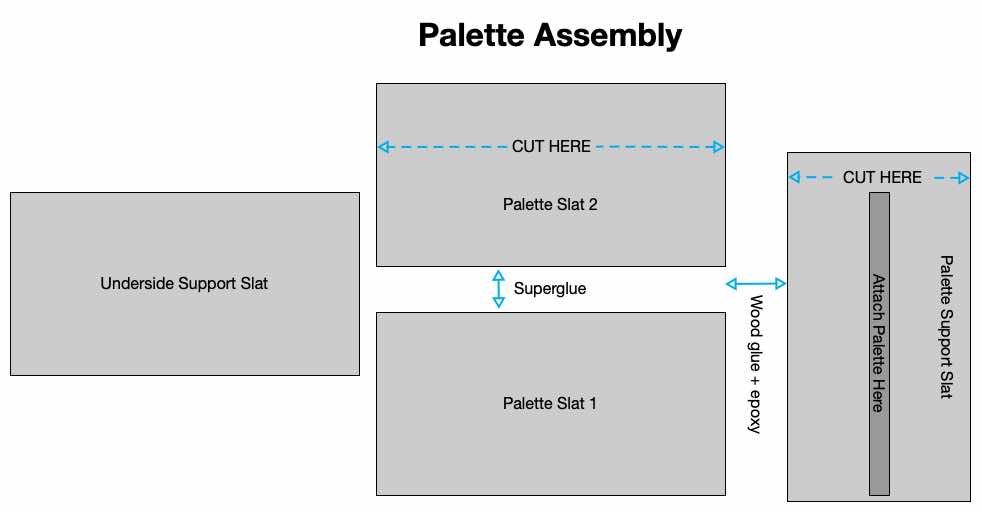
For the palette surface I took two slats (labelled Palette Slat 1 & 2 above) and used my Dremel to slice off roughly one third of the second slat lengthwise. This was a necessary compromise as the two pieces together were otherwise the same width as my entire box, which would have made it impossible to store the palette internally.
With the palette slimmed down, I used superglue to join the two pieces together to form the palette surface. Once the glue had cured for about an hour, I flipped the palette over and and attached a third slat (labelled Underside Support Slat above) centered between the two upper slats – this was to add a little extra structural integrity to the palette overall to prevent the surface pieces from splitting apart if I get overzealous with my brush in the field. I attached this support with a combination of JB Weld Steelstick and superglue.
Next, I used my Dremel to cut a final slat (labelled Palette Support Slat above) lengthwise to just slightly shorter than the side of the box, and then cut down the height of the slat until I could comfortably close the lid of the box while the slat was standing upright.
I pressed this slat up against the edge of the palette and marked the height that it came to. By this point in the process I had exhausted my superglue tube, and went hunting for fresh glue – to my surprise, I found a bottle of wood glue that in retrospect I probably would have used from the beginning had I remembered it was sitting around. Using this glue, I attached the palette to the support slat and left it to dry overnight.
In the morning, I took some more of my JB Weld and applied it around the edge of the join between the two pieces just to make sure it wasn’t going anywhere.
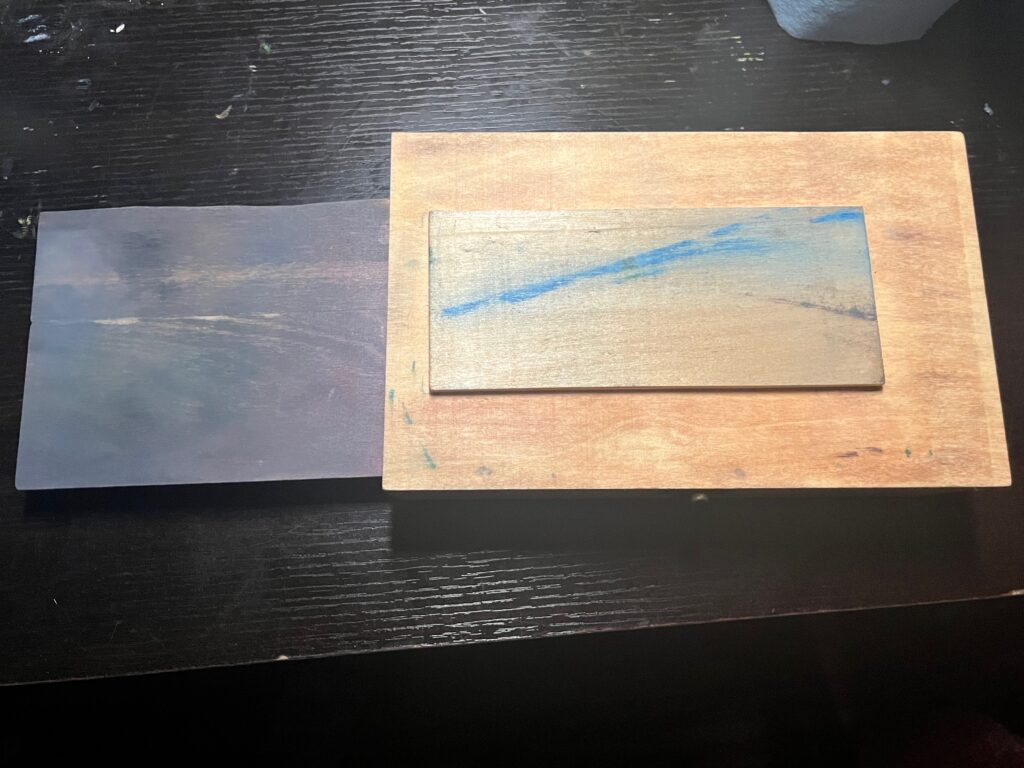
Here is what the assembled palette looks like:
With the body of the palette assembled, I traced out the outline of the palette’s edge against the left side of the pochade box – being left-handed that’s where I prefer my palette to live, but your mileage may vary. With the outline traced out, I set to work with my Dremel again, this time carefully carving out a hole large enough for the palette to slip inside, but tight enough to help hold it securely.
I also took this opportunity to attach another slat to the box, this time to the top of the box’s lid. This is to be where I attach a panel while painting, so I wanted it slightly elevated from the rest of the box surface. I decided on the exact positioning of the slat by first placing it on the lid, then centering a 5×7″ canvas panel on top of the slat, and adjusting until I could comfortably hold the box with a panel attached – this meant centering the slat vertically on the lid, but offsetting it to the left horizontally.
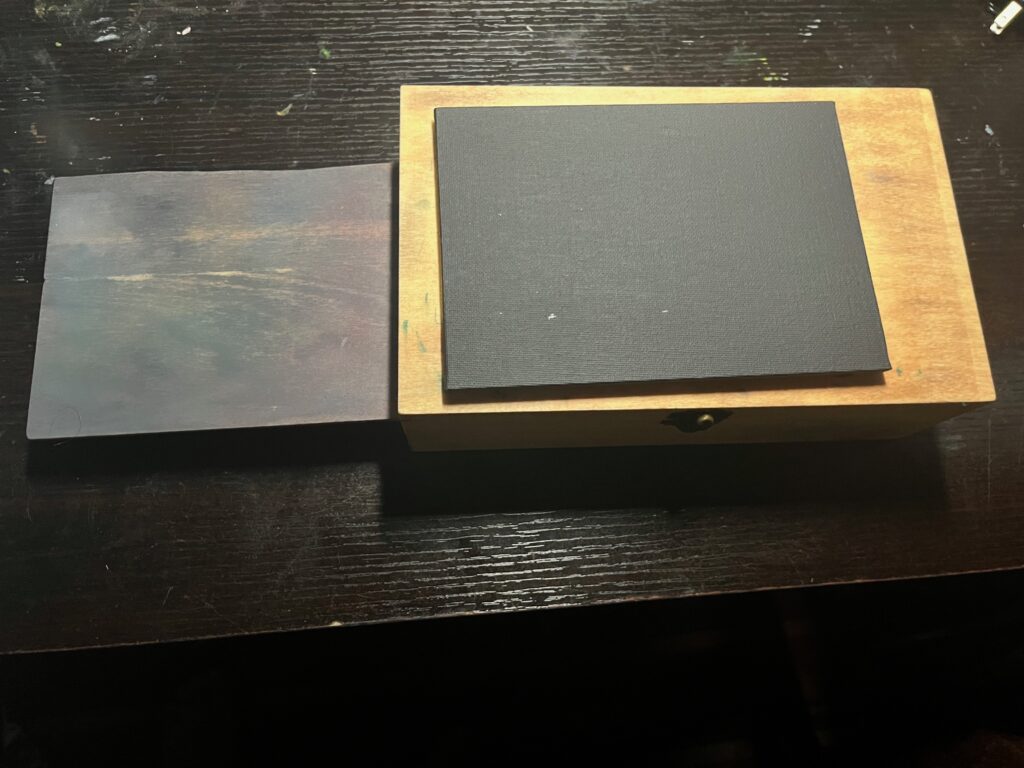
Once the JB Weld on the palette had cured, I inserted the palette through the palette slot from inside of the box and wedged a folded-up piece of paper towel between the palette support slat and the wall of the box for some extra padding. At this point, the box was complete.
Before taking it out, I applied a layer of linseed oil on the palette, and linseed oil mixed with a small amount of burnt sienna paint to the rest of the box – this small amount of pigment was just enough to lend a slightly nicer wood tone to the box.
Unfortunately, I did not take any pictures of the completed box before I took it for a spin outside. I did take some images after getting back from my first outing with the box – you can see those below.
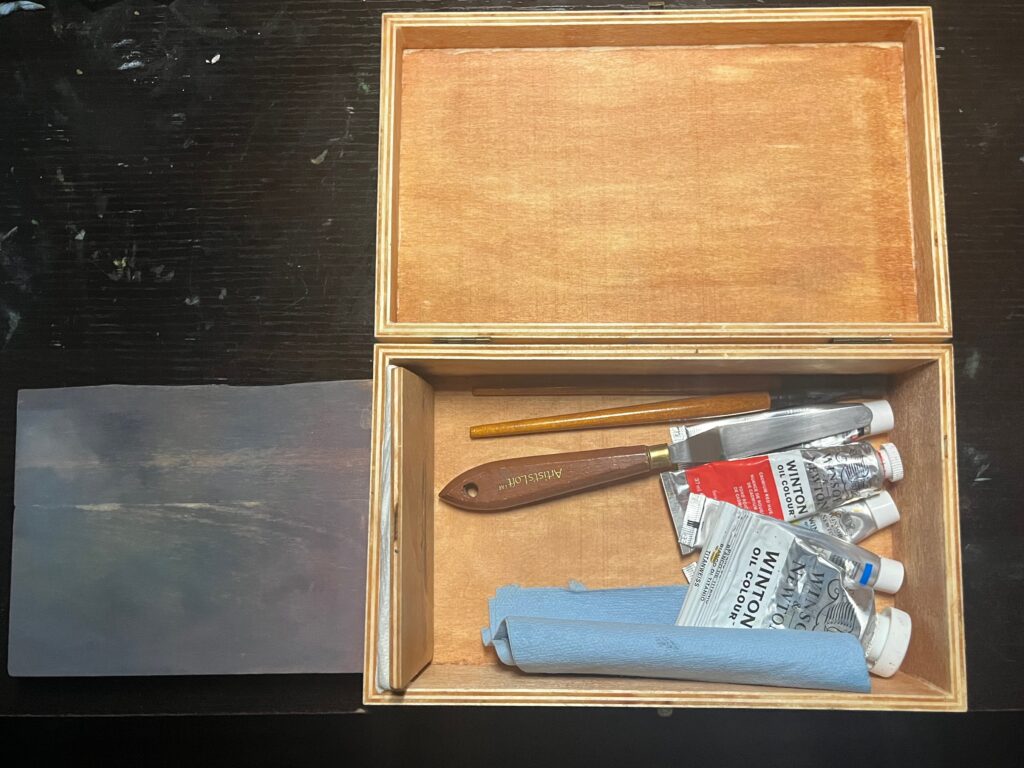
I stuffed two paintbrushes, a palette knife, some shop towels, and a few small tubes of paint (primary colours only – cadmium red hue, lemon yellow hue, cerulean hue, titanium white, and ivory black). With this, my wife and I set out to a nearby pond. While she nestled up to a well-shaded picnic table with a book, I wandered along the pond until I found a nice spot to work from.
I used blue sticky tack to mount my canvas panel (a black panel from Arteza that I had laying around) to the painting support slat. This provides more than enough strength to hold a small panel in place for both painting and transporting the wet panel afterwards and can be removed without damaging the panel.
Fortunately, this spot had a large metal utility box where I could sit, and I loaded up my palette and got to work on my first canvas.
I certainly won’t call the sketch that I produced good. I won’t even call it competent. It turns out that holding a pochade box in your hand while trying to paint with the sun beating down on you as insects buzz around and people stroll past poses some challenges for painting. I also wasn’t entirely happy with the particular selection of colours I brought – most of these are old tubes that I’d never used up precisely because I didn’t prefer them.
Otherwise, the experience was great fun and one I’ll certainly repeat – with better preparation and hopefully a slightly different paint selection this time around. I also expect I’ll eventually invest a little money in a larger tripod-mounted pochade box that can support a 9×12 panel for days when I want to spend more time outdoors, but in the meantime this mini box will work just fine.
In summary, here are what I see as the pros, cons, and takeaways of my homemade pochade box experiment:
Pros
- Very budget-friendly, with the core supplies coming in at $5.75 CAD ($4.21 USD at the time of writing). Even if you need the epoxy and glue, I’d expect the project to come in under $25 CAD, which is still a fraction of the price of most pre-built boxes.
- Box provides plenty of space for everything I need to paint 5×7″ or similarly-sized panels.
- There aren’t many easier or less expensive ways to get started with plein air painting.
Cons
- The price was so low because I already had some of the tools and consumable supplies I needed for this – in particular, if you don’t have a Dremel or similar rotary tool it would be more difficult to build this.
- This box is designed for small panels – if you want to paint anything larger than 6×8″, it would be much more challenging.
- There is no wet panel storage in the box – so unless you have a tote for the panels, this box is only good for a single painting per outing.
- Although the box is intended to be handheld, it is tall enough that holding it this way for an extended period of time is tiring.
- A loose sketch on a 5×7″ panel does not take very long to paint, and without wet panel storage you’ll only be ready for short outings with this box.
Takeaways
- I plan to install a nut on the back of the box to allow attaching a tripod quick-release plate, ideally without preventing the box from sitting flat on a table.
- I think a pop-socket style accessory may make holding the box much easier for longer painting sessions. This should be an inexpensive addition that turns into a big quality of life improvement.
- I’m also looking to either buy or build a suitable carrier for several wet panels. Given how quickly a 5×7″ sketch can be completed, it makes sense to be ready to complete 2-5 sketches per session.
If you’re interested in taking up plein air painting, I highly recommend this as a starting step – the monetary and time investment is small and the end result is a pochade box that’ll stand up to the rigours of at least a few good painting sessions.
Leave a Reply